How to Review a Tech Pack With Your Clothing Manufacturer
The tech pack review is your final safety checkpoint before bulk production. Aligning technical specifications with your manufacturer allows you to avoid costly errors, protect lead times, and lock in quality. This process is not about finding fault, but about achieving alignment between design vision and factory reality. When both sides follow the same blueprint, production becomes faster, cheaper, and significantly less stressful.
Why the Tech Pack Review Matters
A tech pack may look perfect on a screen, but paper does not sew garments. The review is where theory meets industrial limits. Identifying a wrong zipper length or a grading error now is free; fixing it after thousands of units are cut is a financial disaster. A thorough review protects your profit margins and ensures your first bulk shipment matches your approved sample exactly.
What to Prepare Before the Meeting
Preparation transforms a passive call into a productive working session. Arriving with the right data allows the factory to focus on engineering solutions rather than basic corrections.
1. Internal Consistency Check
Before involving the factory, comb through your document. Ensure the Bill of Materials (BOM) matches your technical sketches. If your drawing shows a hidden zipper but the BOM lists standard buttons, fix it immediately to maintain professional credibility.
2. Gather Physical References
Tactile details like drape and hand-feel are hard to convey digitally. Always have your approved fabric swatches, trim cards, and “gold samples” ready. If you are referencing a specific competitor’s fit, use pins or tape to mark the exact areas you want the factory to emulate.

Key Focus Areas During the Review
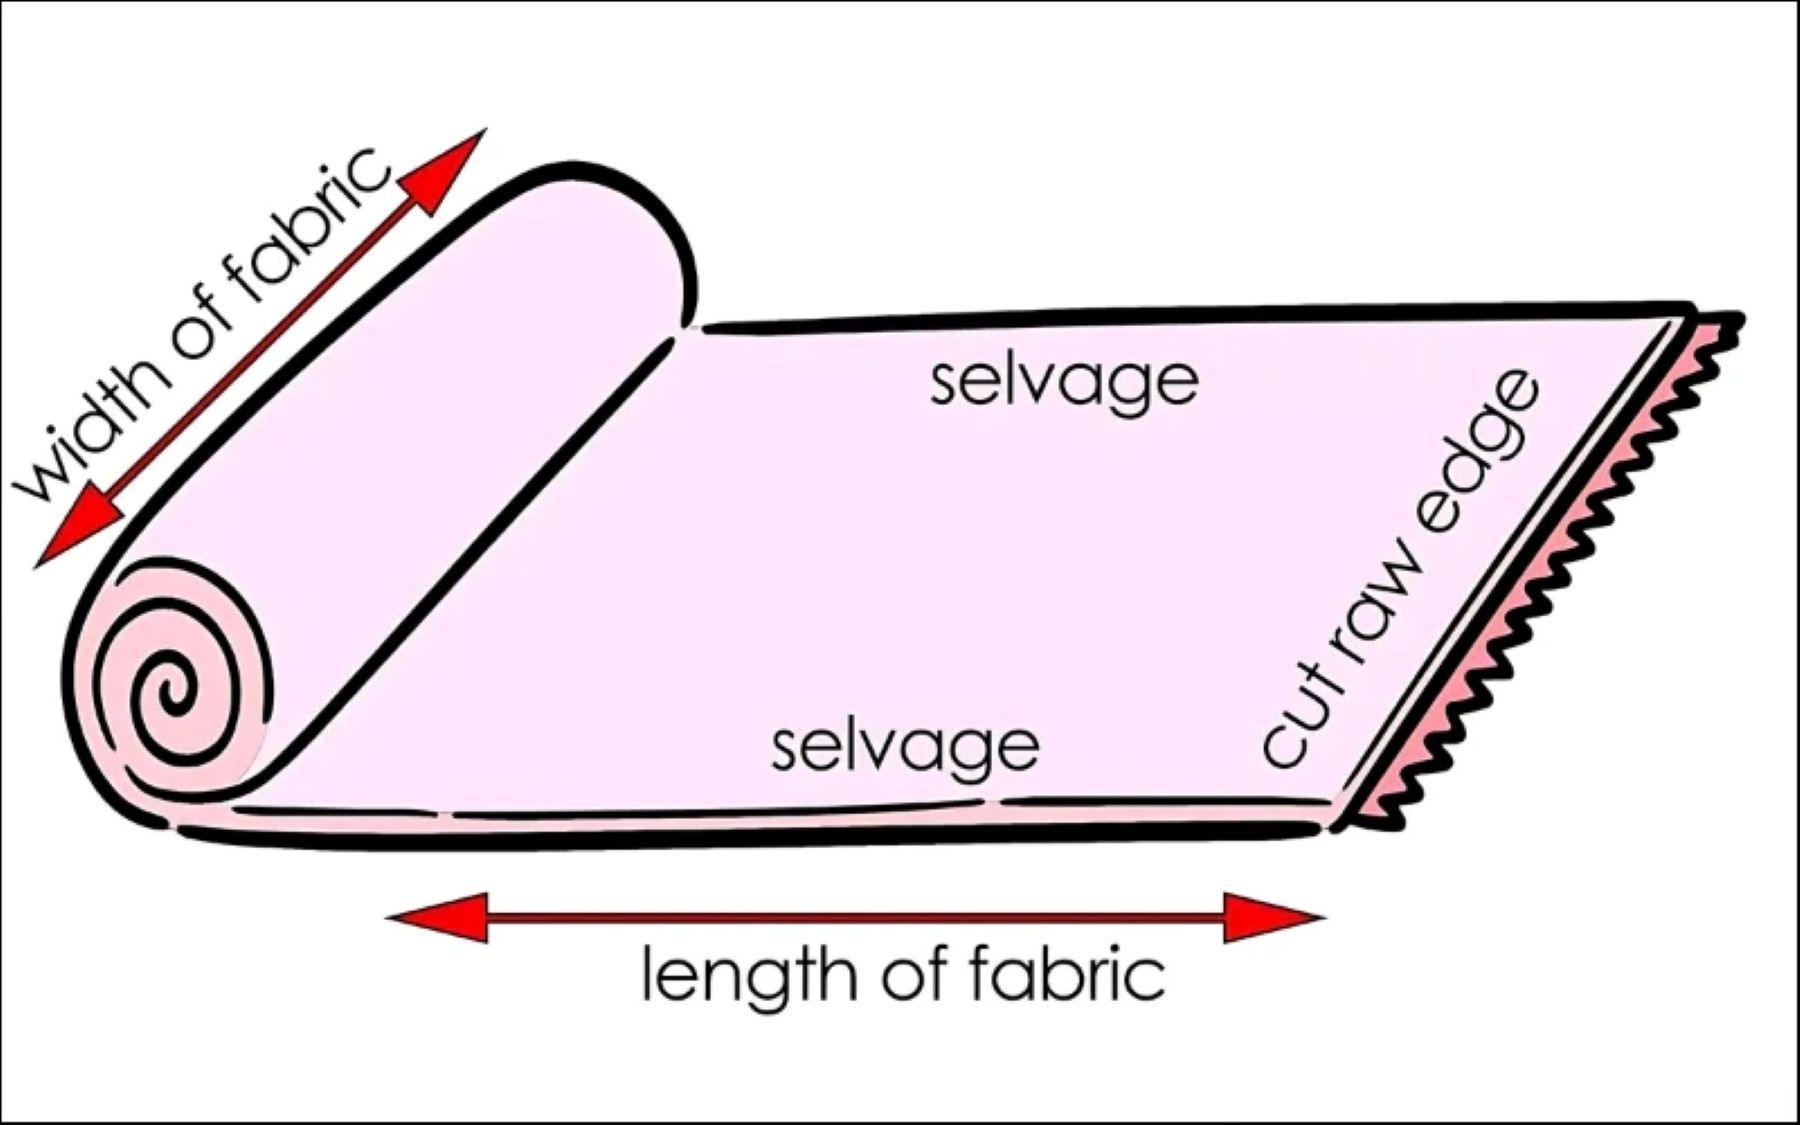
Measurements and Points of Measure (POM)
Fit is the foundation of brand loyalty. Confirm that the factory’s understanding of your POM diagrams aligns with yours—for example, ensure everyone is measuring the chest exactly 1 inch below the armhole. Discuss tolerance limits immediately; if a critical seam cannot hold a +/- 0.5cm tolerance, the design must be adjusted before cutting.
Construction and Stitching (SPI)
Walk through seam types using ISO standard codes (e.g., 301 lockstitch) to remove ambiguity. Discuss Stitches Per Inch (SPI), as this impacts both strength and labor cost. 14 SPI might look premium, but it increases sewing time; ensure the construction method aligns with your target unit price.

How to Structure the Review Meeting
Follow a linear agenda that mirrors the actual production flow to avoid conflicting instructions:
- Technical Flats: Overall design and silhouette.
- Materials (BOM): Fabric codes, Pantones, and trims.
- Construction: Seam types, SPI, and assembly order.
- Measurements: Grade rules and tolerances.
- Final Details: Labels, packaging, and shipping marks.

Final Confirmation: Document Everything
Verbal agreements during a meeting often evaporate. Use a shared, live document to record decisions in real-time. Immediately after the meeting, send a summary and demand written confirmation. Silence is not confirmation—you need an explicit sign-off to ensure the production floor works from the latest “living” tech pack version.
Contact Mekong Garment Factory
- VN Phone/WhatsApp/WeChat: +84 947 729 829
- Email: hanh@kimmy.vn

FAQs: How to Review Tech Packs with Manufacturers
Why is the tech pack review considered the final financial checkpoint before production?
Conducting a thorough assessment at this stage is the last opportunity to make changes without incurring significant costs. Once this review is complete, money, materials, and production schedules are locked in. If errors are discovered after this point-such as after fabric has been cut-the cost to fix them rises dramatically. This meeting ensures that the theoretical design on paper matches the practical reality of manufacturing, securing alignment on quality, cost, and feasibility before the heavy investment begins.
What steps should be taken internally before meeting with the manufacturer?
Preparation transforms the meeting from a passive listening session into a productive collaboration. Before speaking with the factory, review the tech pack with your internal team to identify missing measurements, inconsistent specs, or conflicts between drawings and notes. Mark any unclear areas with comments. Additionally, prepare specific questions rather than vague concerns. For example, ask if a specific stitch type affects durability or if a sleeve opening is achievable with the chosen fabric. Knowing exactly what is non-negotiable versus where you are flexible helps streamline the process.
How does bringing physical references improve the review outcome?
Visual and tactile references reduce interpretation errors significantly better than written descriptions alone. Bringing fabric swatches, trims, and existing garments allows the manufacturer to see exactly what you intend regarding fit or construction. Competitor products can also be useful to demonstrate specific “do’s and don’ts.” These physical items bridge the gap between abstract specs and the final physical product, ensuring that the factory understands your quality and aesthetic standards.
What is the most effective sequence for structuring the review meeting?
Structuring the conversation logically prevents the team from missing details or looping back to previous topics. A proven approach is to follow the natural production flow: start with the overall design and technical flats, then move to materials and trims, followed by construction methods. After those are settled, review measurements and grading in detail, and finish with labels and packaging. This step-by-step method builds a comprehensive understanding and keeps the meeting efficient.
Why is it dangerous to rush through the measurement and grading section?
Measurements dictate the fit, and grade rules ensure consistency across all sizes. Rushing through this section often leads to conflicting proportions or fit problems that require full pattern rework later. If a measurement looks odd, it must be questioned immediately. A small error in the base size can multiply across the size range, ruining the fit for larger or smaller garments. Taking the time to confirm every measurement point and how it is achieved is crucial for a successful production run.
How should decisions and changes be documented to prevent disputes?

Documenting every decision is the only way to ensure accountability. Use a shared review document during the meeting to record what was decided, what was changed, who is responsible for the action, and the deadline. A simple table works well for this purpose. After the meeting, send a summary to the manufacturer and request written confirmation. This prevents memory-based disagreements later and ensures that both the brand and the factory are working from the same set of approved instructions.
Why is clarifying terminology a major focus during the review?
Manufacturing vocabulary can vary depending on the region or the specific factory. Terms for stitches, finishes, or construction methods might mean different things to different people. Assuming that everyone uses the same terminology can lead to unexpected results. It is best to clarify all technical terms and, when necessary, use photos or sketches to remove any doubt. This ensures that the instructions in the tech pack are interpreted exactly as intended, regardless of linguistic differences.