
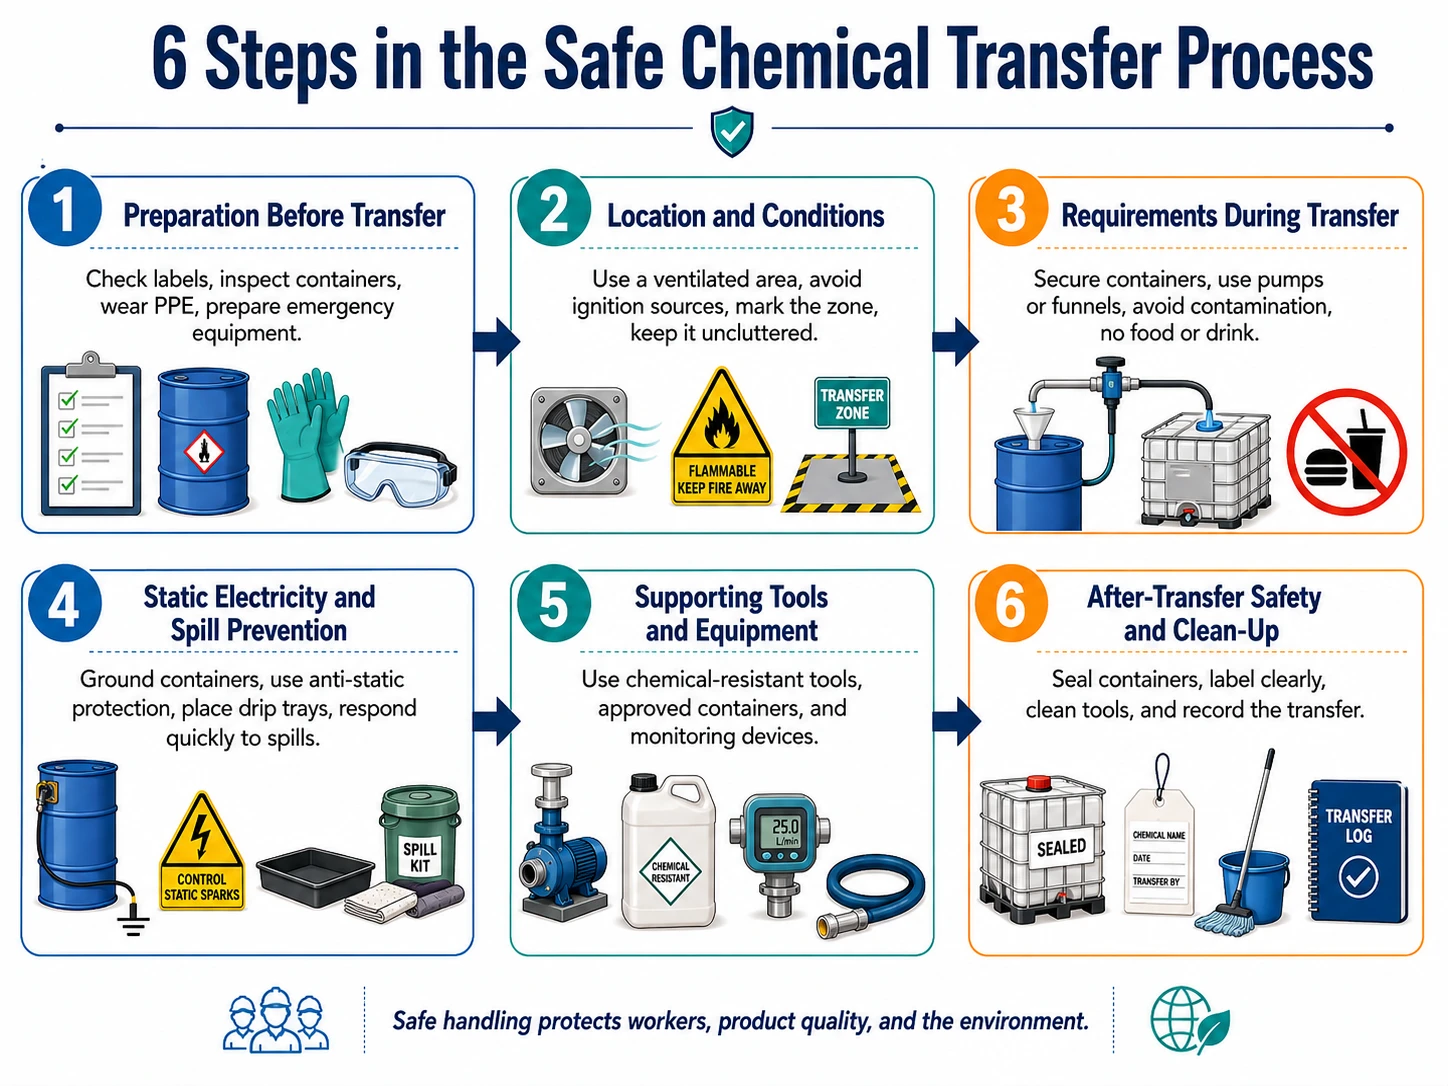
6 Step Chemical Transfer Safety Process for Garment Factories

In the garment industry, chemicals are used in many stages from fabric treatment to dyeing and finishing. Improper chemical transfer may lead to leaks, fires, or serious health problems. That’s why every factory must follow a standardized process. This article will guide you through six essential steps to ensure both safety and efficiency in every operation.
What Is Chemical Transfer?
Chemical transfer means moving a chemical product from one container, storage system, or location into another container or process. Examples include:
- Chemical drum → measuring container
- IBC → dosing tank
- Storage tank → dyeing machine
- Original supplier container → smaller workplace container
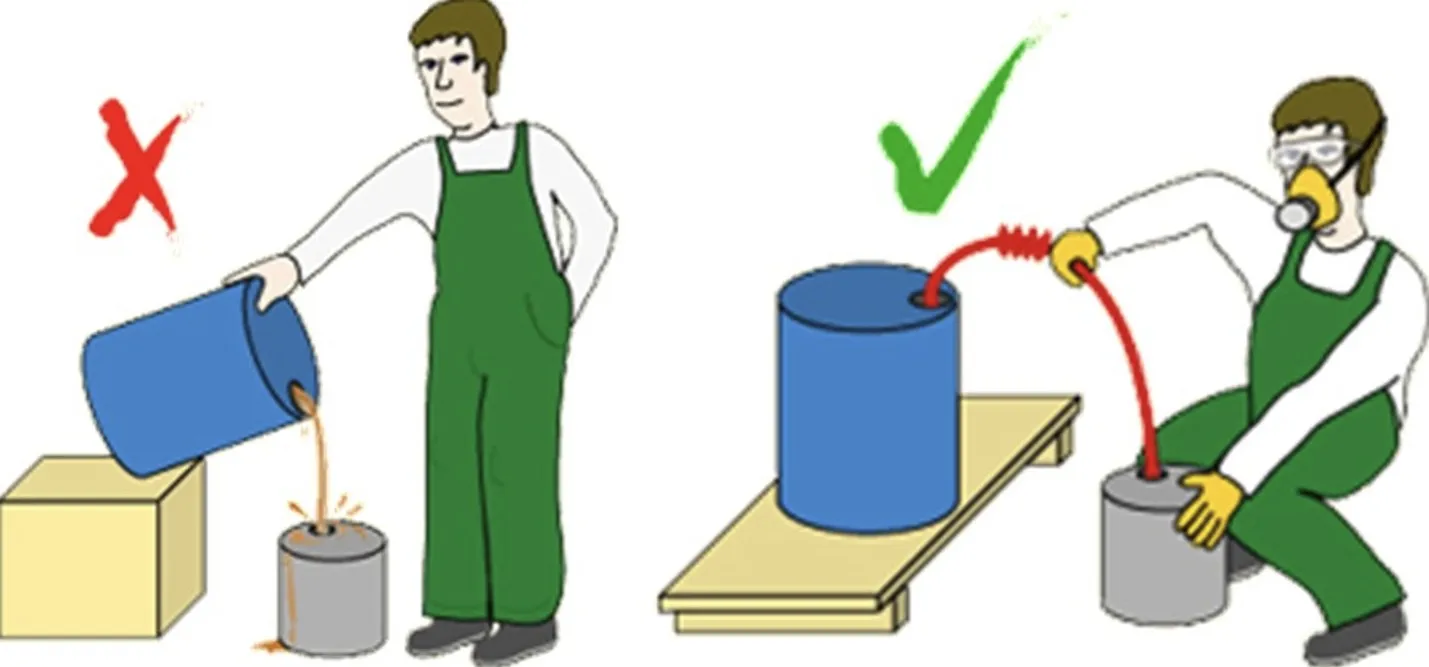
Although the operation may appear simple, the risks can change greatly depending on the chemical. For example, one product may mainly present a skin-contact hazard, while another may be:
- Corrosive
- Flammable
- Reactive
- Oxidizing
- Harmful by inhalation
- Harmful if absorbed through the skin
That is why a factory should never use one identical transfer procedure for every chemical.
Why Safe Chemical Transfer Matters in Garment Manufacturing
Poor chemical-transfer practices can create several types of problems.
- Worker Exposure, Splashes can affect: Eyes, Face, Hands, Skin, Clothing… Vapors, gases, mists, or dusts may also create inhalation risks depending on the chemical and process.
- Fire and Explosion: Some flammable liquids can generate ignitable vapors. Transfer operations can also create static electricity under certain conditions.
- Chemical Reactions: Accidentally mixing incompatible chemicals can result in – Heat generation, Pressure, Fire, Hazardous gases, Violent reactions.
- Environmental Contamination: A spill may enter Floor drains, Wastewater systems, Soil, Surface water.
- Product Quality Problems: Using the wrong chemical, contaminated transfer equipment, or incorrect quantities may affect Shade, Wash appearance, Print quality, Fabric performance, Finishing consistency… Therefore, chemical transfer is both a safety issue and a production-control issue.

The First Rule: Read the SDS Before Transferring a Chemical
Before discussing equipment or PPE, workers need to understand the chemical being transferred. A Safety Data Sheet (SDS) provides important information about a hazardous chemical, including its properties, hazards, protective measures, safe handling, storage, exposure controls, spill response, and other safety information. Workers and supervisors should pay particular attention to SDS sections covering:
- Hazard identification
- First aid
- Fire-fighting measures
- Accidental release measures
- Handling and storage
- Exposure controls and PPE
- Stability and reactivity
The SDS should be readily accessible to employees who handle the product.
6 Steps in the Safe Chemical Transfer Process
| Step | Main Action | Important Checks |
|---|---|---|
| 1. Prepare | Identify chemical and inspect containers | Label, SDS, container condition, quantity |
| 2. Prepare Area | Create controlled transfer conditions | Ventilation, containment, housekeeping, emergency access |
| 3. Select PPE | Protect worker based on hazard | Gloves, goggles, face/body protection, respiratory protection if required |
| 4. Transfer | Move chemical using approved equipment | Stable containers, compatible pump/hose/funnel, no food containers |
| 5. Control Risks | Manage static and spill risks | Bond/ground where required, spill kit, trained response |
| 6. Close & Record | Restore safe condition after transfer | Seal, label, store, inspect, clean, document |
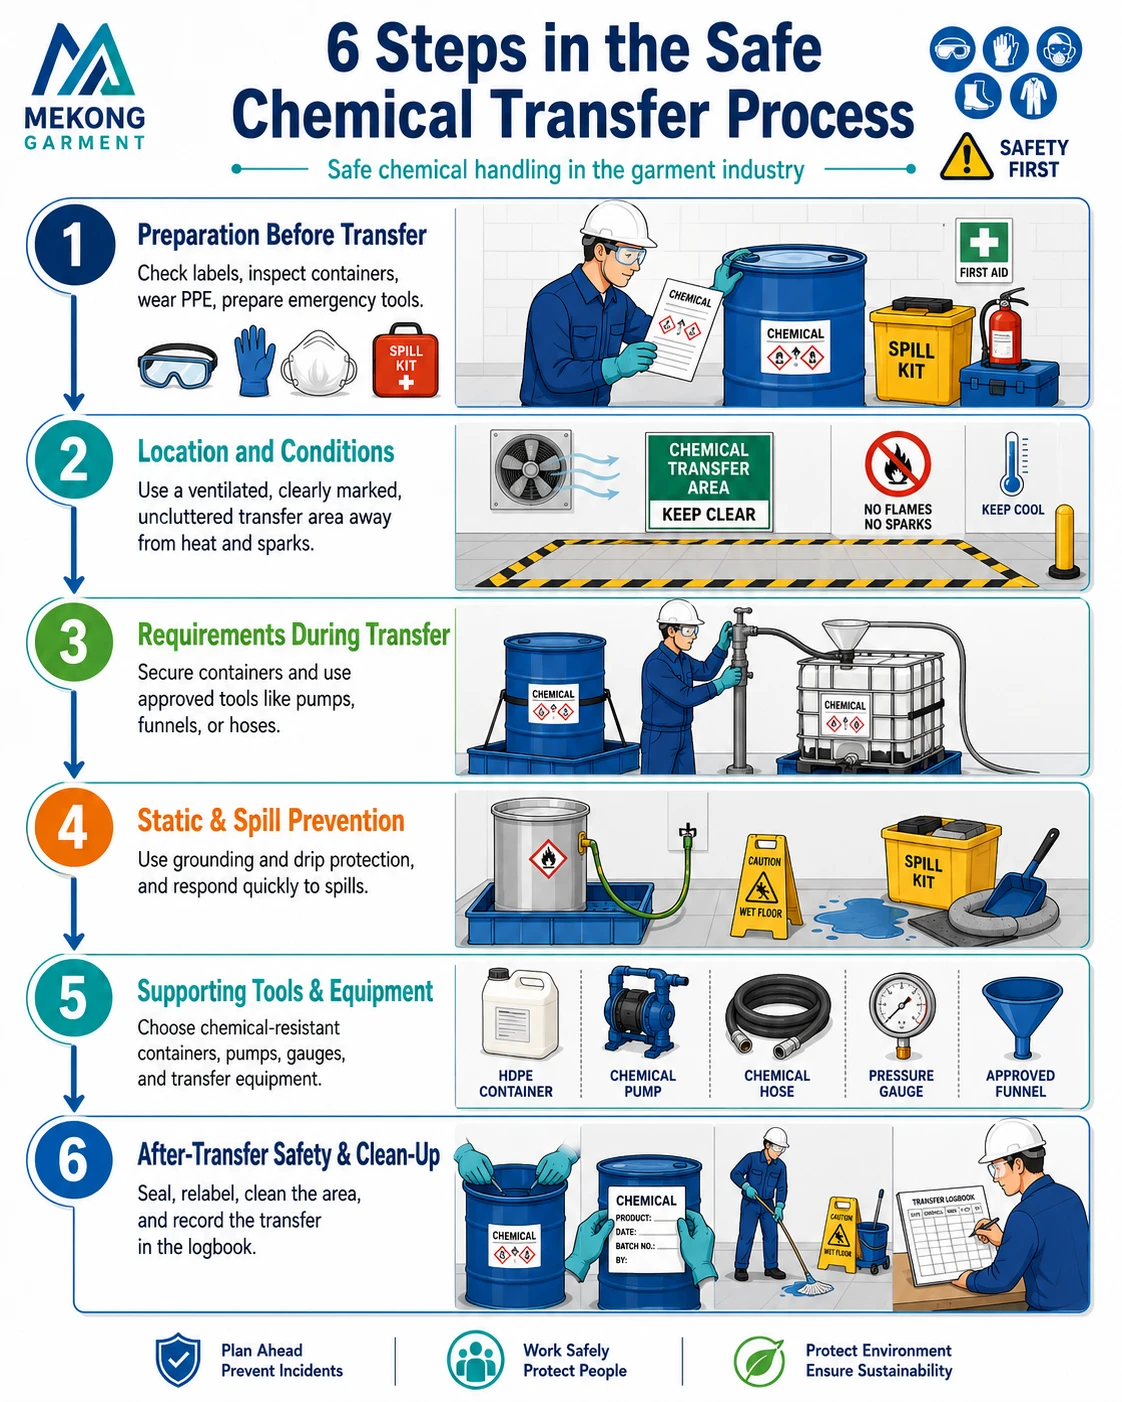
Step 1: Preparation Before Transfer
Preparation is the foundation of safety. A well-prepared setup reduces risks and prevents accidents before they happen. Before beginning, workers should:
- Check chemical labels: Ensure labels are intact, legible, and correctly identify the chemical and hazard type.
- Inspect all containers: Confirm there are no leaks, cracks, dents, or corrosion.
- Wear appropriate PPE: Use chemical-resistant gloves, aprons, safety goggles, and respiratory masks.
- Prepare emergency equipment: Keep fire extinguishers and chemical spill kits within reach.
Step 2: Location and Conditions
The area where the transfer takes place must be well-controlled. Never perform the transfer in random areas or near active production lines.
- Well-ventilated location: Ideally an isolated room with exhaust fans.
- Avoid ignition sources: Keep far away from open flames, sparks, or hot surfaces.
- Mark the area clearly: Use visible hazard signs like “Chemical Transfer Zone.”
- Keep space uncluttered: Ensure easy movement and clear access to emergency exits.

Step 3: Requirements During Transfer
Every movement matters. Even a small splash can cause a dangerous reaction. Follow these safety practices:
- Secure containers: Prevent tipping or spillage by ensuring stability.
- Use proper tools: Use funnels, pumps, or hoses—never pour directly by hand.
- Avoid contamination: Dedicate each tool to a single type of chemical.
- Strict no-food policy: Do not eat, drink, or smoke in the area.
- No food containers: Never reuse plastic water bottles to store chemicals.
Step 4: Static Electricity and Spill Prevention
Static electricity is a silent threat. Preventing these risks starts with proper grounding and proactive containment.
- Grounding: Connect all metal containers to discharge static buildup.
- Anti-static gear: Install anti-static mats or grounding wires.
- Drip protection: Place drip trays under containers to catch accidental leaks.
In the event of a spill: Stop the transfer immediately, isolate the area, and use appropriate neutralizing agents to clean up.
Step 5: Supporting Tools and Equipment
Using the right tools improves efficiency and guarantees safety. Equipment must be compatible with the specific chemical type:
- Resistant equipment: Use funnels and pumps specifically designed for acids or solvents.
- Standard containers: Use HDPE plastic or reinforced glass that meets safety certifications.
- Monitoring: Use flow meters or pressure gauges to track progress.
Step 6: After-Transfer Safety and Clean-Up
Safety doesn’t end when the liquid stops flowing. Post-transfer actions are crucial for long-term traceability:
- Seal immediately: Tighten all container lids as soon as the transfer is done.
- Label clearly: Include the chemical name, hazard class, date, and personnel involved.
- Clean everything: Use neutralizing agents on tools and the surrounding floor.
- Log activity: Record the date, type, and quantity in the chemical transfer logbook.
Conclusion / Final Words
Safe chemical transfer is a shared responsibility among all factory members. Following this six-step process builds a culture of safety that protects lives, the environment, and the company’s reputation. Together, we can make garment production safer, cleaner, and more sustainable.